
- Views
- Creating a New Load
- Name & Description
- Shipping Details
- Load Details
- Stops - Legs
- Additional Details
- Deleting a Load
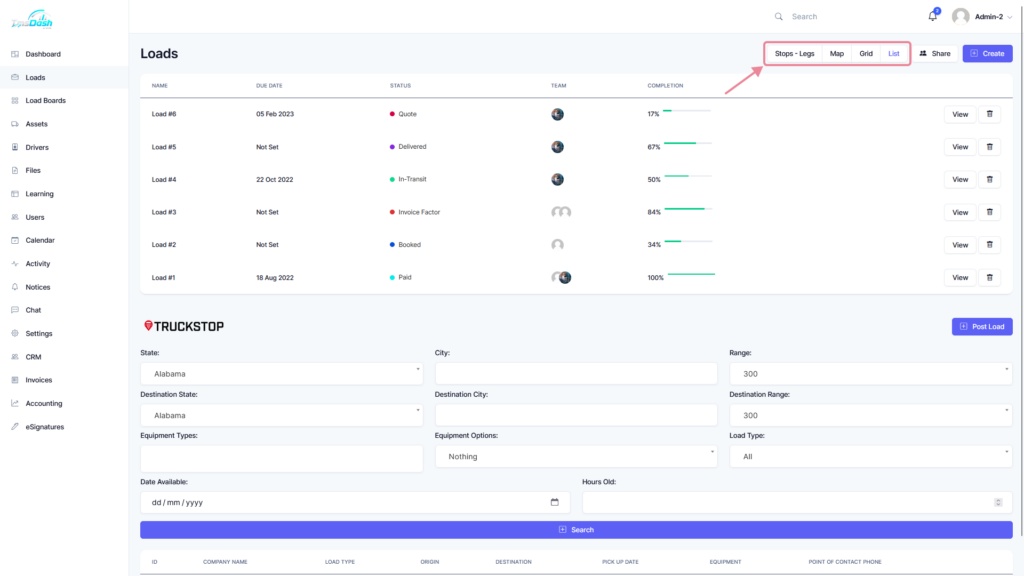
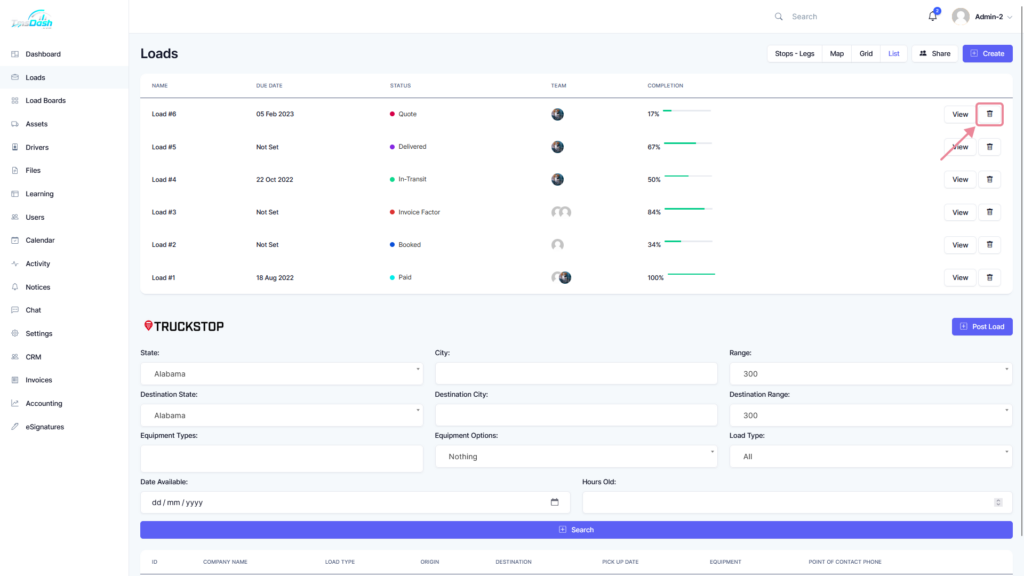
The Loads page will display all the loads as well as the options to create, edit or delete them.
Views #
You can switch between the following different views:
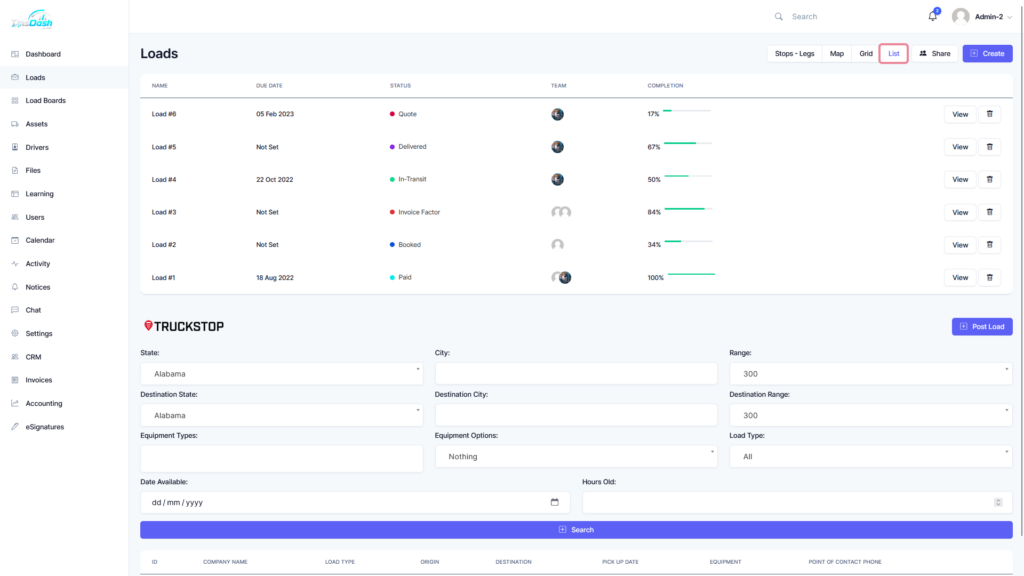
List View #
The list view will display all loads as a list.
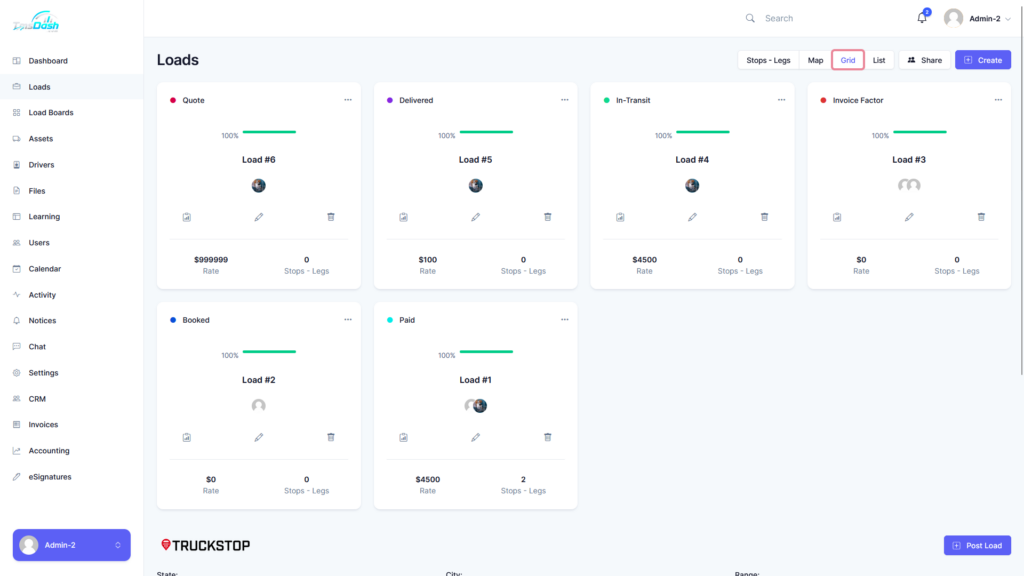
Grid View #
The grid view will display all loads as a grid.
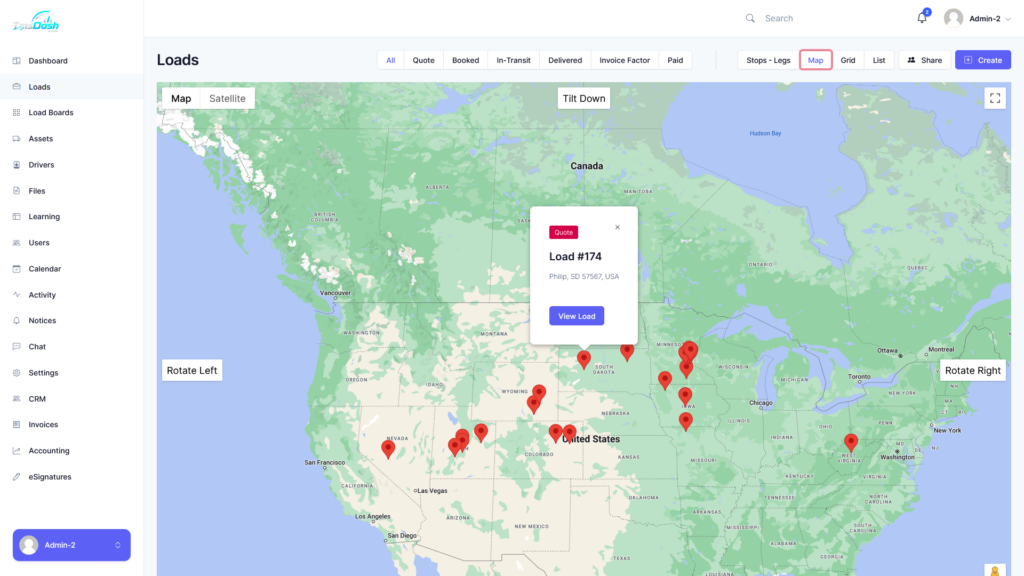
Map View #
All loads will be displayed inside a map with their locations, these loads will be visualized by a red pin icon.
Clicking on one of the loads will show the basic details of the load and will give you the option to fully view the load.
Creating a New Load #
You can create a new load by clicking on the “New Load” button on your dashboard page, or by clicking the “Create” button on the Loads page.
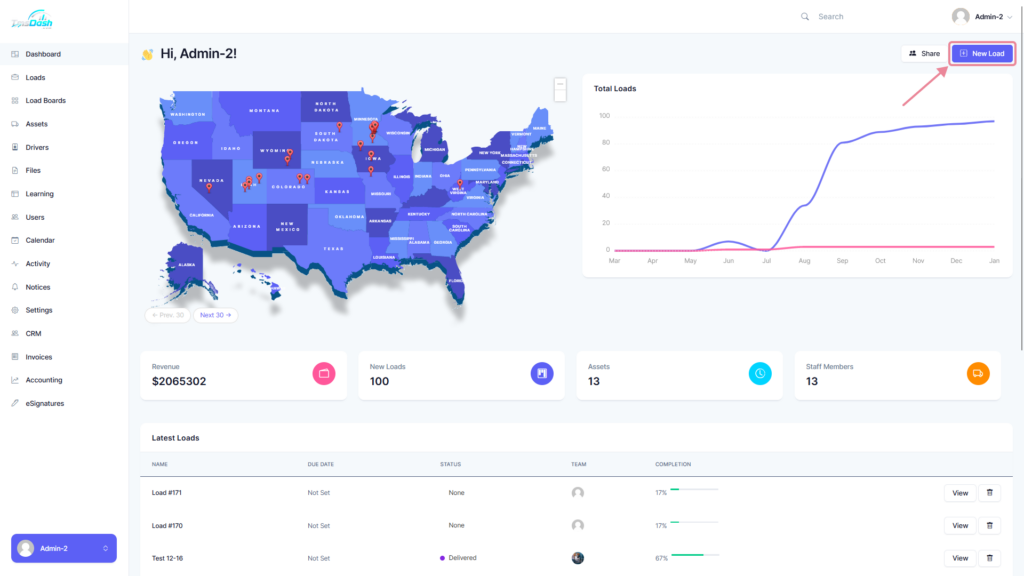
Once a new load is created, you will be able to fill in the details for the load.
Name & Description #
You can assign a name and description to your load.
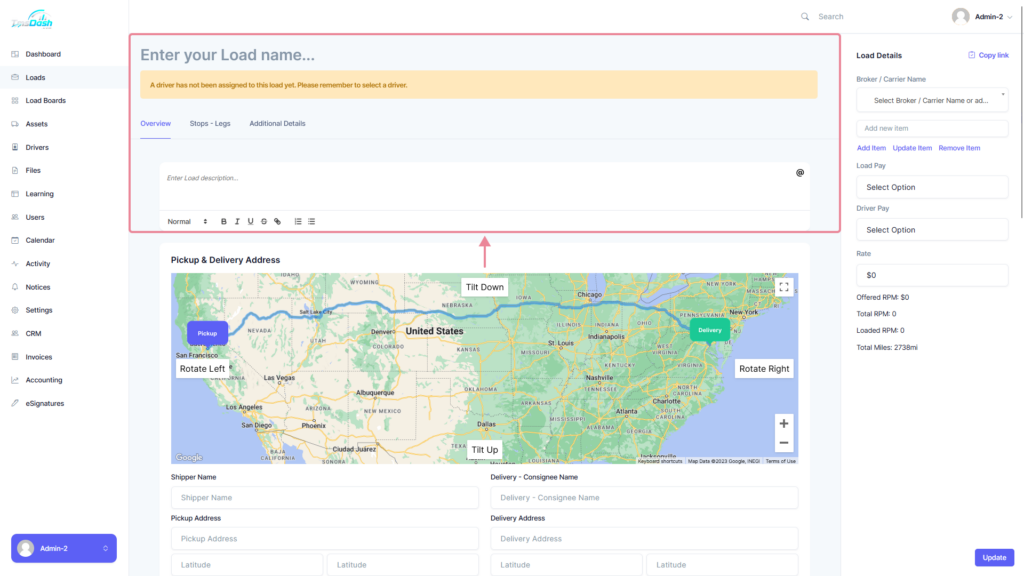
Shipping Details #
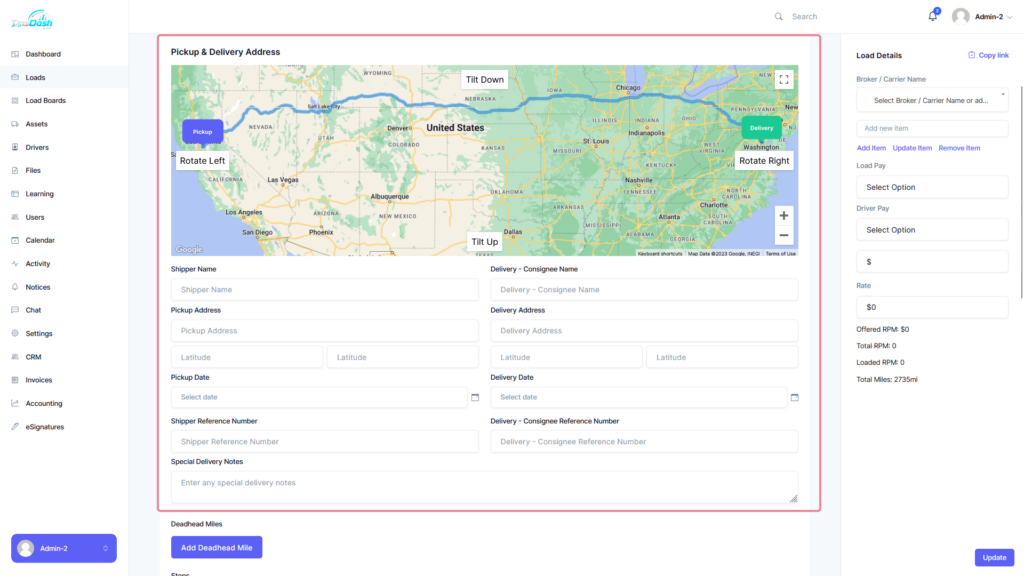
Pickup & Delivery Address #
The pickup and delivery dates can be edited or set using either of the following two methods:
- Simply drag the pins labeled “Pickup” and “Delivery” on the map to desired locations.
- Set the pickup address and delivery addresses in the fields below the map by searching for a location.
Below the map, you’ll find details to fill in for your load, including:
- Shipper Name
- Delivery – Consignee Name
- Pickup Address
- Delivery Address
- Pickup Date
- Delivery Date
- Shipper Reference Number
- Delivery – Consignee Reference Number
- Special Delivery Notes
Adding Deadhead Miles #
Click the “Add Deadhead Mile” button to add multiple deadhead miles to your load. A popup will appear, allowing you to enter the starting and ending locations, as well as a name for the deadhead mile.
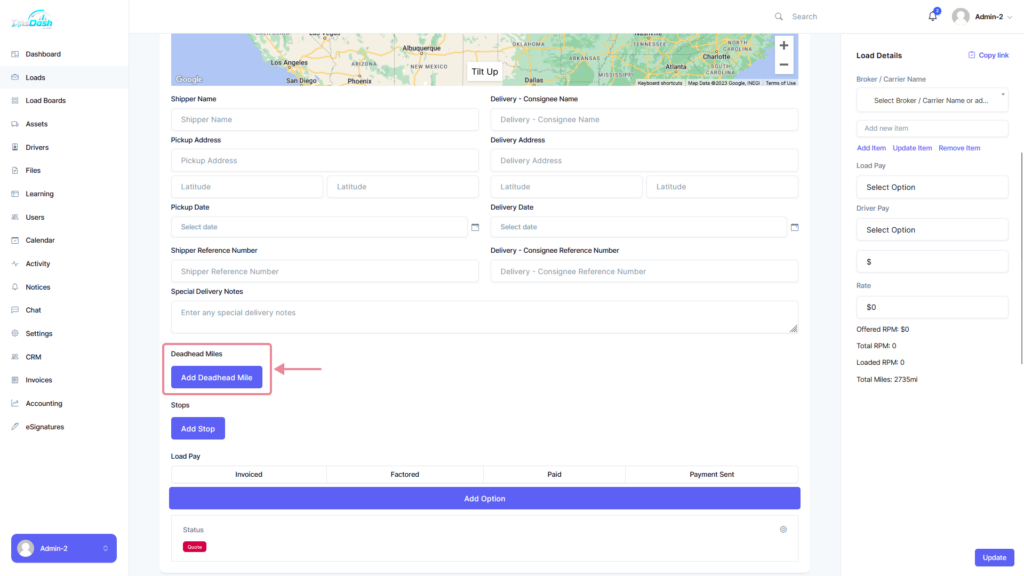

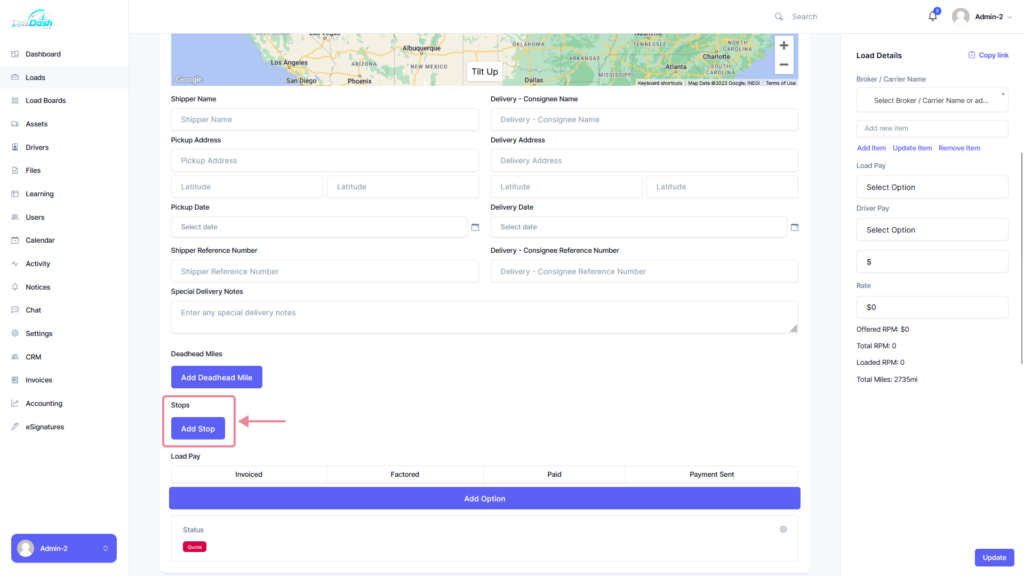
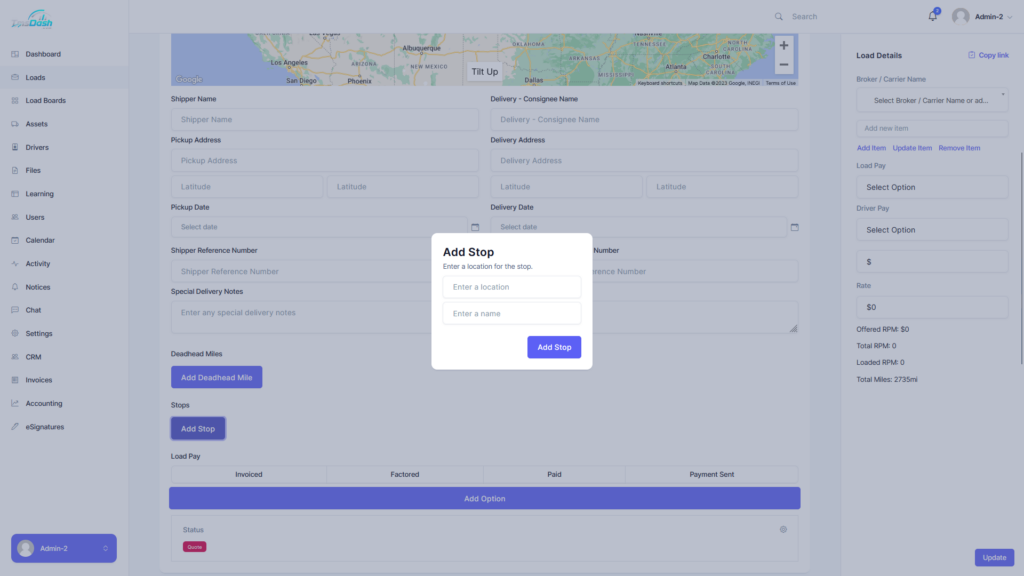
Adding Stops to Your Route #
To add stops to your route, click the “Add Stop” button in the “Stops” section. Enter a location or search for one, then give it a custom name. The route on the map will automatically update with the new stop between the pickup and delivery locations.
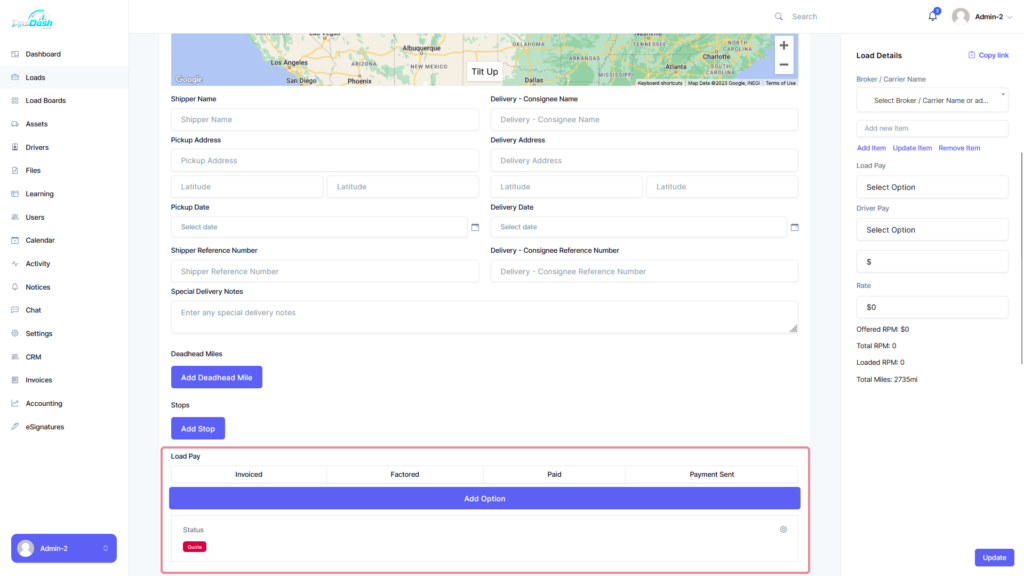
Load Pay #
You can update the load pay by selecting one of the options provided, which contains:
- Invoiced
- Factored
- Paid
- Payment Sent
If an option needs to be added you can click on the “Add Option” button.
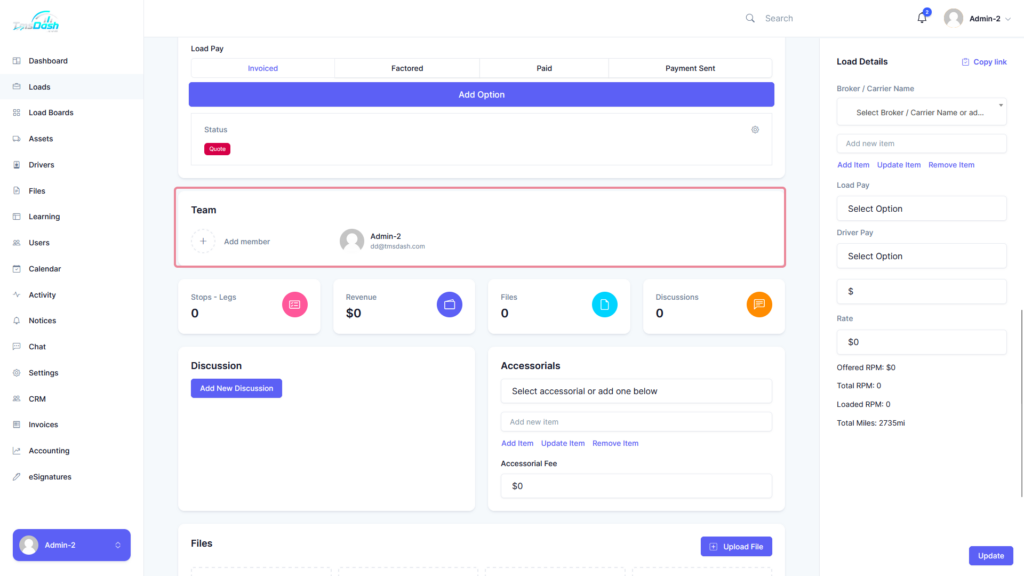
Teams #
To add members to the load, you can click on the “Add member” button and select a member to add.
Discussions #
Discussions allow you to send messages and have conversations about a load.
To add a new discussion you can click on the “Add New Discussion” button. Within the discussion, you can send messages about the current load.
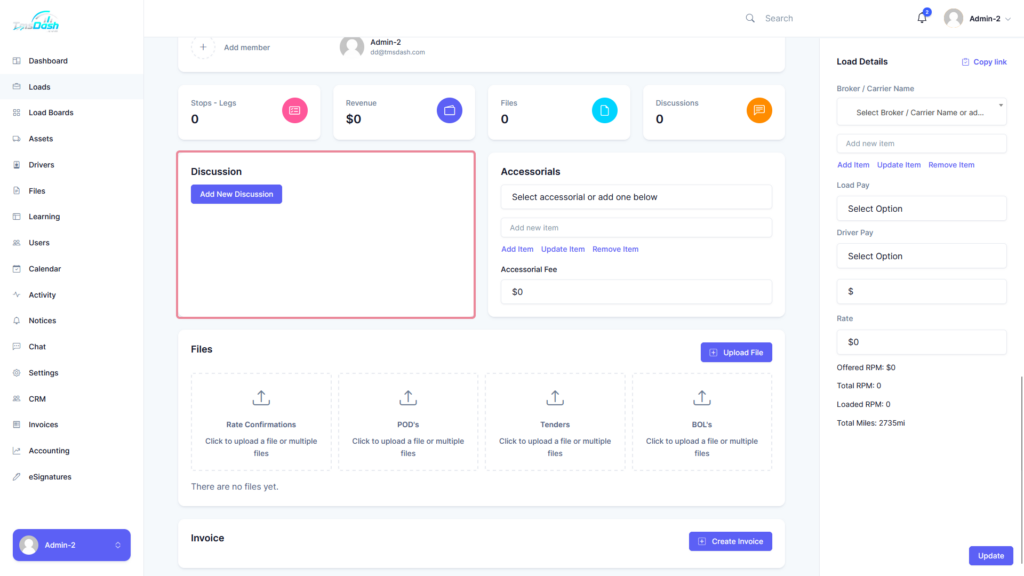
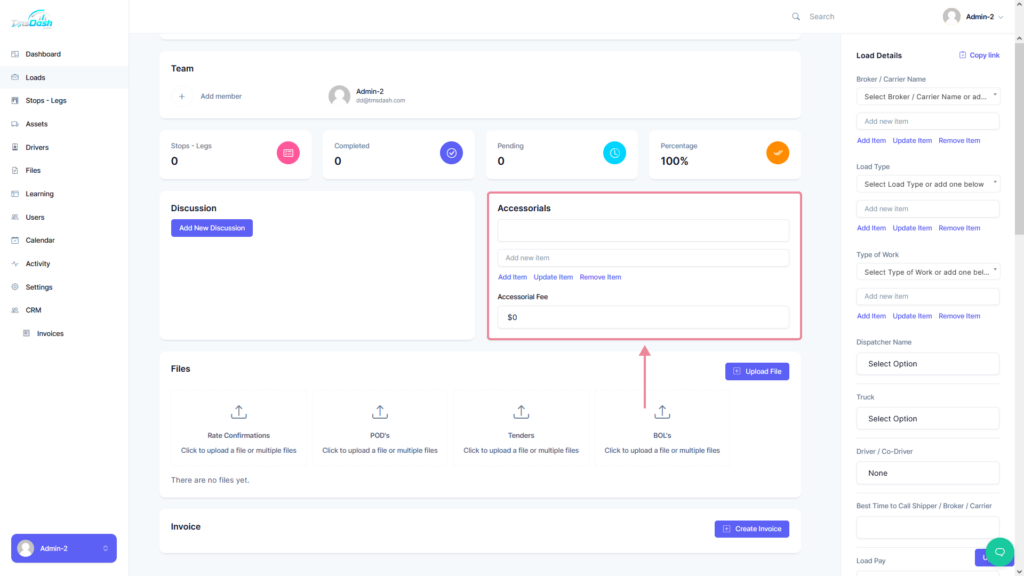
Accessorials #
Select an accessorial with the dropdown list or add a new one in the input field below by pressing the “Add Item” button. You can also update and remove accessorials.
Updating Accessorials #
Select the accessorial you want to update, type your new value in the input field and click “Update Item”.
Removing Accessorials #
To remove an accessorial, select it from the dropdown and click “Remove Item”.
Accessorial Fee #
Set the fee for the accessorial.
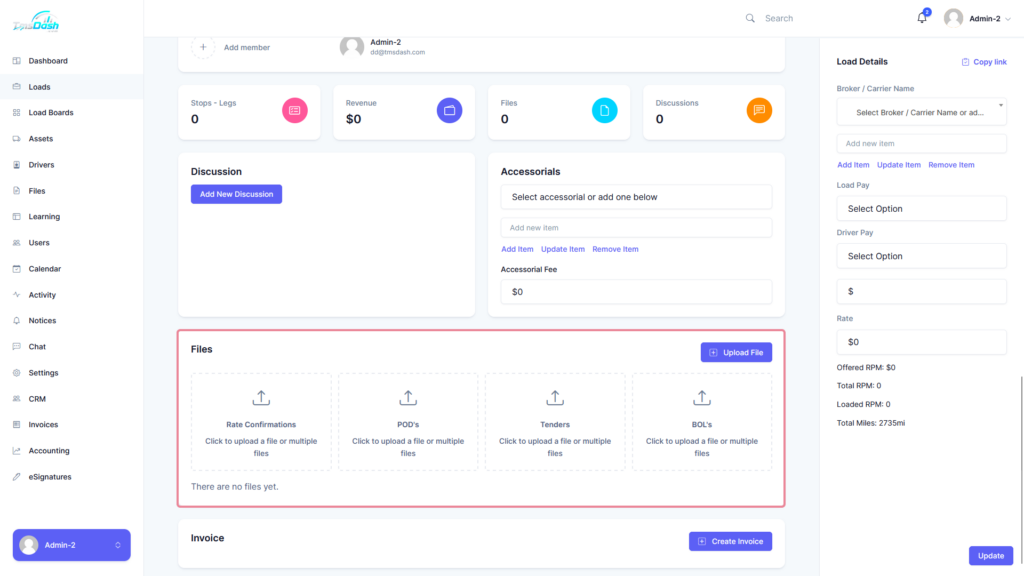
Files #
To add new files/documents to your load click the “Upload File” button and choose your files to upload.
You can also choose to upload files to the provided categories.
- Rate Confirmations
- POD’s
- Tenders
- BOL’s
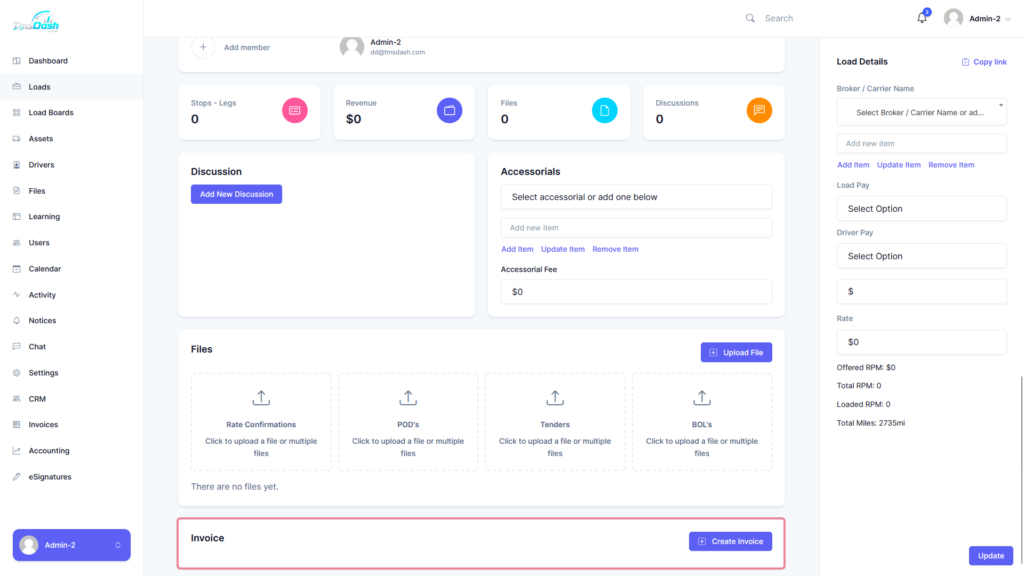
Invoice #
You can create a new invoice by clicking on the “Create Invoice” button. The invoice is automatically calculated based on the rate and information entered in the load settings.
Load Details #
The remaining load details and information can be filled in on the right hand sidebar.
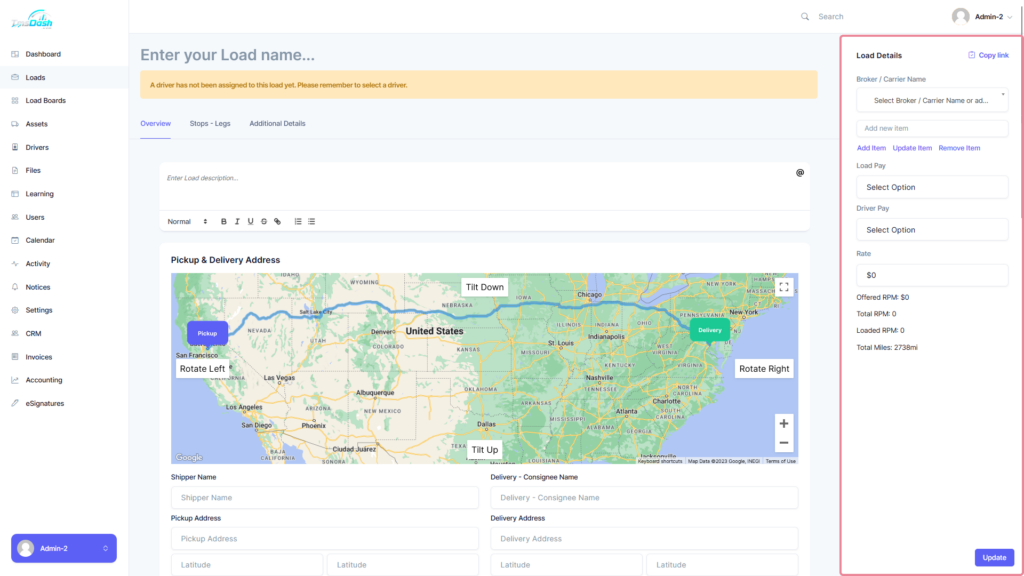
Below are the descriptions for each of the options:
Broker / Carrier Name #
You can select a broker / Carrier by choosing their name from the dropdown list. If the broker is not already in the dropdown list you can add a broker / carrier by typing the name into the input field below the dropdown and then clicking on the “Add Item” button.
You can also update and remove brokers / carriers.
Updating Brokers / Carriers #
Select the broker you want to update in the dropdown list, type the new value in the input field then click on “Update Item”.
Removing Brokers / Carriers #
To remove a broker / Carrier select the broker / carrier’s name, then click on ‘Remove Item’.
Rate #
Enter your price rate here. The Offered RPM (Rate Per Mile), Total RPM, Loaded RPM and Total Miles will be calculated right below the rate field based on your entered amount.
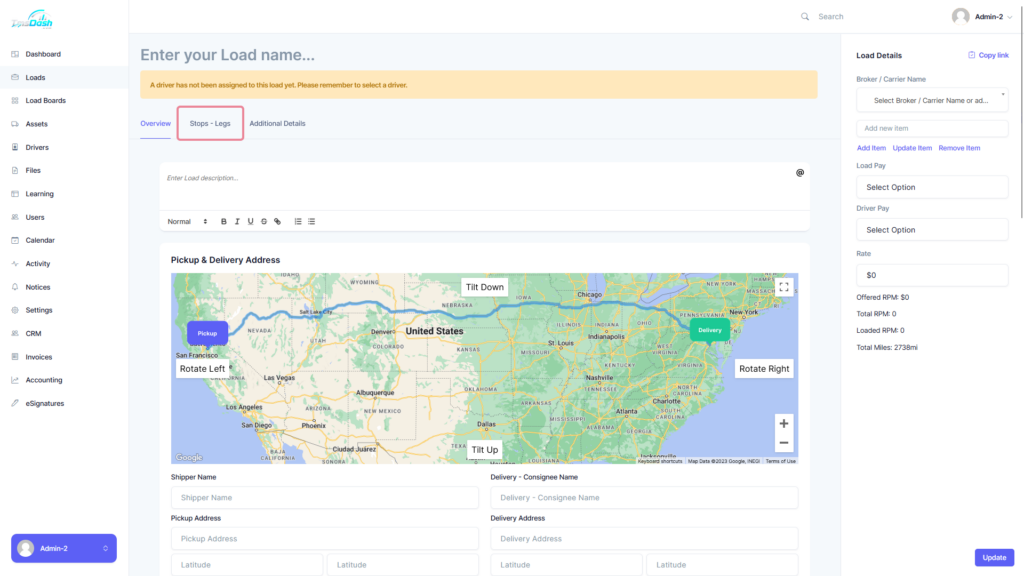
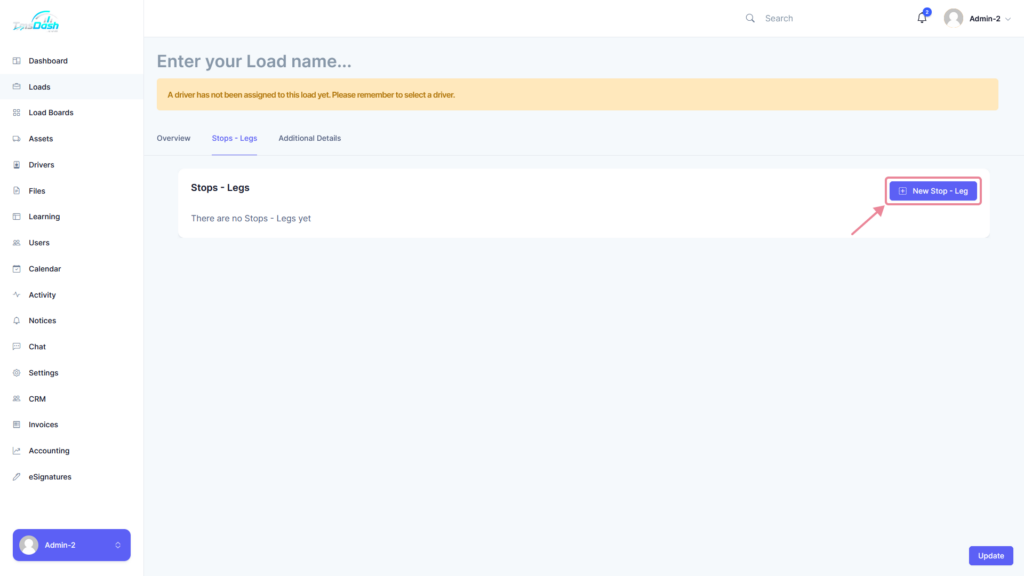
Stops – Legs #
The Stops – Legs tab will display all the stops – legs that are created for the load.
Creating New Stops – Legs for Loads #
To add new stops – legs to your load, click the “New Stop – Leg” button. This will display a popup where you can enter the details listed below in the “Stop – Leg Details” section.
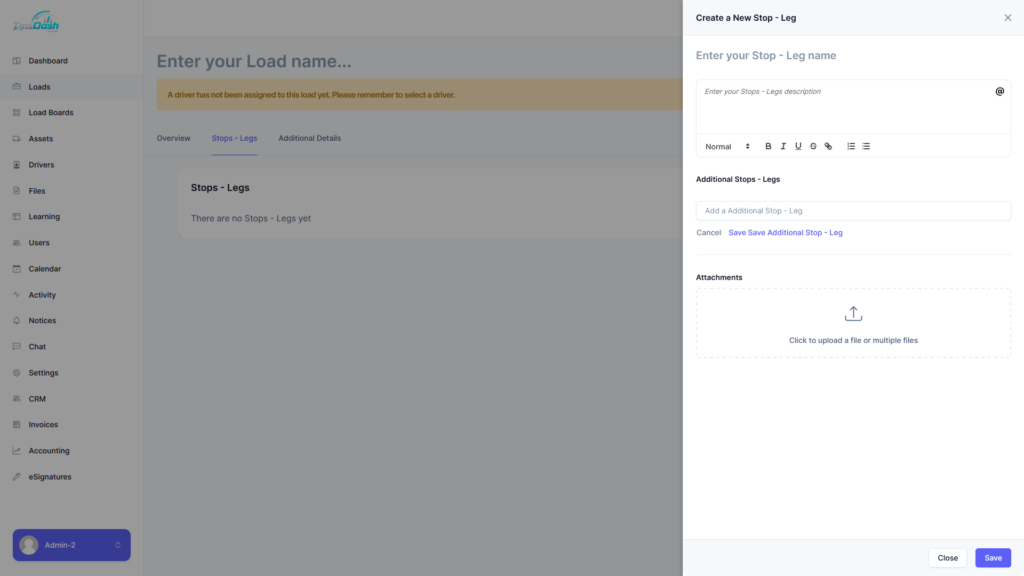
Stop – Leg Details #
Stop – Leg Name #
Enter the title for your stop – leg here.
Stop – Leg Description #
Enter the description for your stop – leg here.
Additional Stop – Leg #
Add an additional stop – leg by entering your additional stop – leg name and clicking “Save Additional Stop – Leg”.
Attachments #
You can add attachments here by clicking on the upload box and uploading your files.
Additional Details #
In the additional details tab you will be able to fill in the following additional details for the load:
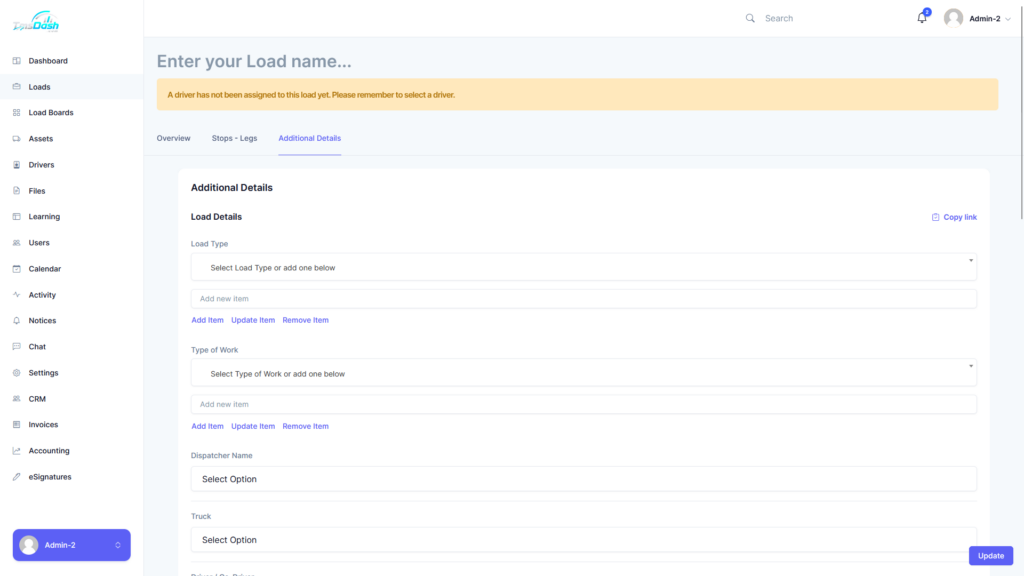
Load Type #
You can select a load type from the dropdown list.
If a load type you want is not already in the dropdown list you can add a load type by typing the name into the input field below the dropdown and then clicking on the “Add Item” button.
You can also update and remove load types.
Updating Load Types #
Select the load type you want to update in the dropdown list, type the new value in the input field then click on “Update Item”.
Removing Load Types #
To remove a load type select the load type, then click on ‘Remove Item’.
Type of Works #
You can select the type of work for your load from the dropdown list. If a load type you want is not already in the dropdown list you can add a work type by typing the name into the input field below the dropdown and then clicking on the “Add Item” button.
You can also update and remove work types.
Updating Work Types #
Select the work type you want to update in the dropdown list, type the new value in the input field then click on “Update Item”.
Removing Work Types #
To remove a work type select the load type, then click on ‘Remove Item’.
Dispatcher Name #
You can select a dispatcher from the dropdown list provided.
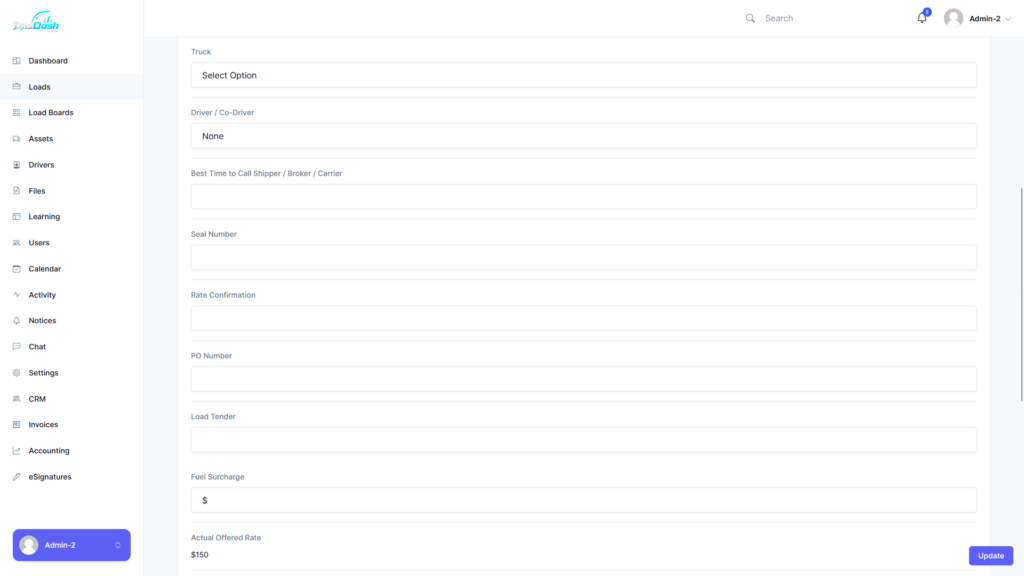
Truck #
You can select a Truck from the dropdown list provided (All assets that have been created from the Assets page will be displayed in the dropdown list).
For more information on creating assets click here.
Driver / Co-Driver #
You can select a driver / co-driver from the dropdown list provided.
Best Time to Call Shipper / Broker / Carrier #
Choose the best time for calls to be made to the shipper / broker / carrier by typing the time in the input field.
Seal Number #
You can enter your seal number here.
Rate Confirmation #
You can enter the rate confirmation for your load.
PO Number #
This is where you can enter the Purchase Order number.
Load Tender #
Here you can enter the load tender.
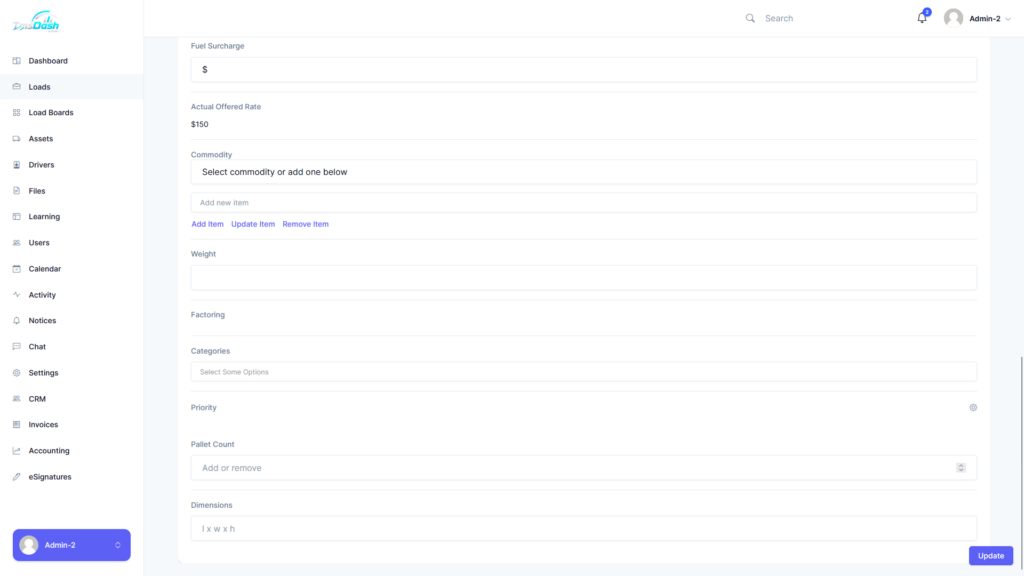
Fuel Surcharge #
You can enter the total cost for fuel usage in this field.
Actual Offered Rate #
This will display the original offered rate.
Commodity #
You can select a commodity by choosing a item from the dropdown list, if your commodity is not in the dropdown list you can add one by typing it in the given input field and clicking “Add Item”.
Updating Commodities #
Select the commodity you want to update, type your new value in the input field below and click on “Update Item”.
Removing Commodities #
Select the commodity you want to remove and then click on “Remove Item” to remove an accessorial.
Weight #
Set the weight of the shipping items.
Factoring #
You can enable/disable factoring by clicking on the toggle button.
Categories #
You can categorize your load by selecting the relevant categories from the list.
Priority #
Clicking on the icon on the right hand side of the priority option allows you to set the current priority of your load.
Pallet Count #
The amount of pallets your load contains.
Dimensions #
The size of your load (Length x Width x Height).
Deleting a Load #
To delete an load head to your “Loads” Page and then locate the load you want to delete. Go over to the right hand side of your load and you should see a “trash” icon, click on the trash icon and that should delete your load.


Responses